A Guide to Throwback Challengers 2026
Replies
I've been writing these up while I've been fighting the challengers; I hope you find them helpful!
I mainly focus on which constants (infinite use weapons and scrolls) to pick for each opponent. If you need some ideas about how to fill out the rest of your set, I have a write-up over here under the "Supplementing Your Constants" spoiler.
Challenger info (stats, weapons, full loot) can be found all in one place here.
The challengers will be around until the end of day on March 8th.
[box=pink]Quick tips[/box]
Loot Breakdown
(Loot Overview)
Can stop at 10 wins: Ping Two-Headed Dysfunctional Teddy Bear Bloodred Golem Saherimos Manticore Mortaurus Cozcoatl
Standardized loot tables: King Chelon (100 wins) Rain Sylph (100 wins) Panzer Hydra (50 wins) Pylot Attacks! (50 wins) Vintage Prodigy (35 wins)
Give out boosters: Bonesaw (as many wins as you're able, low chance) Vintage Prodigy (first 35 wins) Crawbeast (as many wins as you're able, high chance) Gelatin Stomper (as many wins as you're able, high chance)
Achievements: Mini Gelatin (up to 3,500 wins) Panzer Hydra (10 wins) Gelatin Stomper (up to 15 wins)
Freezing
Everyone can be frozen EXCEPT Mortaurus and Cozcoatl.
Perilous Whirlpool 33% 7 AP |
Shriek of Despair 66% 15 AP |
Psycho Smasher 66% 16 AP |
Strong Stomp 66% 17 AP |
Cold Blast 40-70% 13 AP |
- Perilous Whirlpool can be made at the Secluded Shrine at about 400k per copy if you're on a budget.
-
Strong Stomp heals least negatively if your pet has over 6,667 health.
-
Cold Blast gets an extra edge in freezing (70%) against Crawbeast and Gelatin Stomper since they have over 4k speed. You can make copies yourself by fighting Daemon and Mama Mush 75 times each for their tattered scroll pieces (per pet).
[box=pink]The guides (15 of 15 done 🎉)[/box]

This is one of the easiest challengers of the bunch and can be beaten at any tier.
• This opponent only has one weapon, Purple Goo, which attacks with dark (:dmg:dark:) and earth icons (:dmg:earth:). Ideally we want to find two infinite use weapons that block these icons (:block:dark::block:earth:) in order to protect our pet from the incoming damage.
:block:dark:3 |
:block:earth:4 |
Terracoon Battle Mask and Shinwas Battle Wings are solid, affordable options for pets at tier 1 because they block the correct icons (:block:dark::block:earth:) while also having a solid amount of attack. If you're battling for the achievements with a stronger pet, I recommend looking through SubetaLodge's weapon filter for more options that better suit your pet's tier.
• The easiest scroll to obtain for smaller pets battling this opponent is going to be Divine Denizhen, which costs about 1mil sP to make at the Secluded Shrine. It doesn't require a ton of intelligence (8 AP) and blocks the necessary icons (:block:dark::block:earth:), plus it heals your pet a little each turn (:heal:5%). If you have space for more scrolls, Sticky Webs is a good once per battle scroll with some attack icons, an ability to heal, and a very affordable price.
Divine Denizhen :block:dark:3 :block:earth:3 :heal: 5% 8 AP |
+ optional |
Sticky Webs :dmg:physical:11 :dmg:dark:11 :heal: 199 HP 14 AP |
Ping is also an easy challenger and can be beaten at any tier.
• Ping is a little more complex than the previous challenger and uses three elements this time: physical (:dmg:physical:), dark (:dmg:dark:), and water (:dmg:water:). We want to find two weapons that will help block them (:block:physical::block:dark::block:water:).
:block:physical:2 :block:dark:2 |
:block:physical:2 :block:water:2 |
Endeavor Gauntlets and Pegleg of Slipping are two tier 1 weapons that when used together will help block Ping's attacks to preserve your health points. Both also have attack icons as well so you can hit back.
• Just like with the previous challenger, we can use Divine Denizhen scroll again to help block Ping's attacks and heal us (:heal:) each turn. If you have room for more scrolls, Sticky Webs is an affordable choice that you can use when you need some healing. It also has attack icons, as well as a small chance to freeze your opponent.
Divine Denizhen :block:physical:3 :block:dark:3 :block:water:3 :heal: 5% 8 AP |
+ optional |
Sticky Webs :dmg:physical:11 :dmg:dark:11 :heal: 199 HP 14 AP |
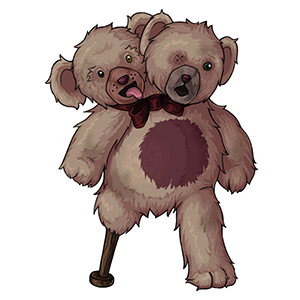
This teddy bear is less friendly than it looks, but is still beatable at any tier.
• The Teddy Bear uses four elements this time: physical (:dmg:physical:), dark (:dmg:dark:), earth (:dmg:earth:), and fire (:dmg🔥). Again, we want to find two weapons that can block as many of these elements as possible.
:block:physical:2 :block🔥2 |
:block:dark:2 :block:earth:2 |
Together, Pink Moon Rod and Angelic Rod can actually block all four of the Teddy Bear's elements (:block:physical::block:dark::block:earth::block🔥) which makes them a perfect combo. We don't always get this lucky in battling, but it's very helpful when we do.
• Once again, Divine Denizhen is going to be really helpful here since the Teddy Bear uses four different elements and it can help block every single one of them while healing (:heal:) you each turn. If you have the extra AP, I'd also equip Sticky Webs. It can be used once per battle to restore your pet's health if it gets low.
Divine Denizhen :block:physical:3 :block:dark:3 :block:earth:3 :block🔥3 :heal: 5% 8 AP |
+ optional |
Sticky Webs :dmg:physical:11 :dmg:dark:11 :heal: 199 HP 14 AP |

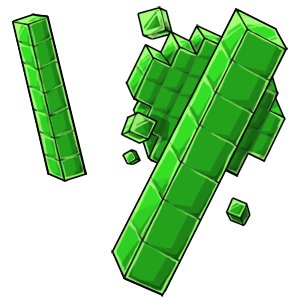
This pixelated challenger is recommended for pets at tier 3 or higher.
• King Chelon gets even more complex than our first three easy challengers and uses six different elements in his attacks! It's difficult to block all six at once with just two weapons, so we're going to focus on the most common ones instead: physical (:dmg:physical:), fire (:dmg🔥), and magma (:dmg:magma:).
:block:physical:8 |
:block🔥6 :block:magma:6 |
These two weapons also have one modification slot each. Mod crystals allow you to customize your weapons. For instance, you can add more defense to help block those elements that your weapons couldn't (:block:wind::block:light::block:dark:). Or you can add more attack to help defeat the challenger faster (in King Chelon's case, :dmg:light::dmg🧊:dmg:wind:). Oftentimes there really isn't a right or wrong answer and it comes down to personal preference. Just buy some cheap ones and try them out :P
• We can still use our Divine Denizhen scroll here and it's going to come in handy for blocking all of the various elements that King Chelon can do. Sticky Webs is still an affordable once per battle healer (:heal:) that you can equip if you have spare AP.
Divine Denizhen :block:physical:3 :block🔥3 :block:magma:3 :block:wind:3 :block:light:3 :block:dark:3 :heal: 5% 8 AP |
+ optional |
Sticky Webs :dmg:physical:11 :dmg:dark:11 :heal: 199 HP 14 AP |
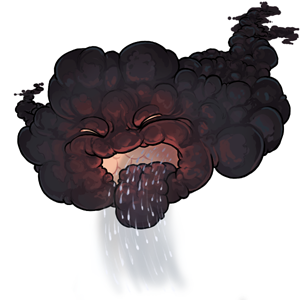
This tantrum-throwing little raincloud is recommended for pets at tier 3 or higher.
• All together Rain Sylph uses five different elements in its attacks, so we want to find two weapons that help block its wind (:dmg:wind:), dark (:dmg:dark:), water (:dmg:water:), physical (:dmg:physical:), earth (:dmg:earth:).
:block:wind:5 :block:earth:5 |
:block:water:4 :block:physical:6 |
These two weapons block four out of five of those icons. Nice! For a little extra blocking, I would add mod crystals that also help block dark and some extra wind, since Rain Sylph's wind attack are its strongest.
:block:dark:5 |
:block:wind:6 |
• I recommend continuing to use Divine Denizhen scroll here and filling out any extra AP with copies of Sticky Webs. For easy and medium level challengers, Divine Denizhen simply makes the most sense to help with blocking, while also healing (:heal:) and not using very much AP. It's a good choice for up and coming battle pets that likely haven't read very many books yet.
Divine Denizhen :block:wind:3 :block:dark:3 :block:water:3 :block:physical:3 :block:earth:3 :heal: 5% 8 AP |
+ optional |
Sticky Webs :dmg:physical:11 :dmg:dark:11 :heal: 199 HP 14 AP |

This questionable robot is recommended for pets at tier 4 or higher.
• The Golem uses quite a few different elements, but the main three are physical (:dmg:physical:), dark (:dmg:dark:), and magma (:dmg:magma:).
:block:physical:7 |
:block:dark:5 :block:magma:5 |
These two weapons will block all three of his most common elements (:block:physical::block:dark::block:magma:). Scaled Sickle is unique: it boosts your pet's strength, defense, and speed on each turn during battle to make your pet even stronger. The effect will end once the battle does, but it's really cool for helping your pet defeat challengers like this one, who uses physical (:dmg:physical:) attacks.
• The two weapons above have a total of three modification slots and I would fill those up with three specific mod crystals:
:block:magma:5 |
:block:earth:7 |
:block:light:4 |
Using these crystals on your weapons will help block more of the Golem's attacks. His Bloodred Chelon Gem uses more magma than our weapons block, so adding more magma blocking (:block:magma:) with our crystals is a good idea. The earth (:block:earth:) and light (:block:light:) blocking from the other crystals will help cover the other elements on his weapons. (Note: I picked out different types of crystals because their prices vary widely and these were the least expensive.)
• So, which infinite use scroll shall we pick? (You only need one).
Aftershocks :block:physical:5 :block:dark:5 :block:earth:7 :heal: 7% 15 AP |
Feather Explosion :block:physical:23 :heal: 7% 20 AP |
Divine Denizhen :block:physical:3 :block:dark:3 :block:magma:3 :block:earth:3 :block:light:3 :block🧊3 :heal: 5% 8 AP |
Aftershocks or Feather Explosion might be a little more appealing since they can heal (:heal:) more and have attack icons, but Divine Denizhen is still a good and inexpensive beginner scroll that will block a little of all of the Golem's icons.
• Don't forget that you can still add some Sticky Webs if you have extra AP and need to fill out the rest of your scroll set with something inexpensive. It can heal (:heal:) your pet a little, has some attack and defense icons, and also has a small chance to freeze.
+ optional |
Sticky Webs :dmg:physical:11 :dmg:dark:11 :block:magma::block:earth::block:light::block🧊 :heal: 199 HP 14 AP |
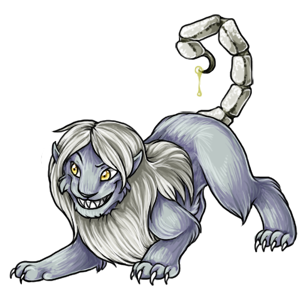
This cheerful kitty is recommended for pets at tier 5 or higher, but can be attempted at tier 4.
As you may have noticed, this is a no heal challenger. So, what does this mean? It means both your pet and the opponent cannot heal during battle. Very fancy! But fun fact: that also means there's no negative healing either ;) Negative heals are sometimes used to balance out overpowered weapons, and with no heal opponents you can get all of the benefits without having to worry about the costs.
• Blocking is going to be even more important than usual against this challenger because you cannot heal during battle. You only have the health points you come in with and that is all you will get, so you need to conserve them as much as possible. The Manticore only uses four different icons - fire (:dmg🔥), earth (:dmg:earth:), wind (:dmg:wind:), and physical (:dmg:physical:) - and I'm going to help you block all of them.
:block🔥18 or 20 or 25 |
:block:earth:6 :block:wind:6 :block:physical:6 |
These two weapons are inexpensive and block all the right icons. Together they have a total of three modification slots and I would mod them with parched crystals to protect against being frozen by the Manticore's Bellow.
• So, which infinite use scroll should we use? (You need only one).
Protector of the Rich :block🔥10 :block:physical:11 18 AP |
Holy Deluge :block🔥10 :block:earth:10 8 AP |
Aftershocks :block:earth:7 :block:physical:5 15 AP |
Divine Denizhen :block🔥3 :block:earth:3 :block:wind:3 :block:physical:3 8 AP |
Protector of the Rich, Holy Deluge, and Aftershocks are generally going to be better scrolls because they also have attack icons in addition to their defense. However, Divine Denizhen isn't a bad pick if you need something cheaper.
• This opponent is freezable and the freezing scrolls won't negatively heal you if you decide to use them in battle. Cool! But I wanted to take a look at some other once per battle scrolls that you could also use.
Cobalt Eternal :block:earth::block🔥:block:physical: 8 AP |
Spacial Abyss :block:earth::block🔥:block:wind::block:physical: 18 AP |
Gigan Blow :block:earth: 7 AP |
Perilous Whirlpool :block🔥 7 AP |
Typhoon of Valor :block:wind: 7 AP |
Almost all of these scrolls can be made using the Secluded Shrine, save for Cobalt Eternal which is in the Millionaire Center. Spacial Abyss is pretty special here because it usually has a negative heal, which is eliminated when healing is disabled. Perilous Whirlpool has a chance to freeze and also provides some fire blocking at the same time.
• Lastly, I would add these two once per battle weapons to your set. They generate blessings that will defense against the Manticore's four elements. Just be careful when you use them, because their weapons don't have any intial defense and the blessings won't be active until the next turn. I would pair them with one of your constants or use a blocking scroll on the same turn that you use them to provide cover.
:block:earth:15 :block:wind:15 10 turns |
:block🔥12 :block:physical:12 5 turns |
⭐ P.S. Remember to visit The Healer between battles! You'll want to start each battle at full health.
Panzer Hydra
[box=khaki]Panzer Hydra (Five-Headed)[/box]

This challenger is recommended for pets at tier 6 or higher.
• This hydra mainly uses physical (:dmg:physical:), dark (:dmg:dark:), fire (:dmg🔥), and magma (:dmg:magma:) attacks. On the cheaper end of the price range, these first two weapons are solid to pair together. They cover three of these elements and both do water damage, which is one of the elements (:dmg:water::dmg:wind::dmg🧊) that the hydra's Slow Roll Scroll does not block.
:block:physical:8 :block🔥8 :dmg:water:5 |
:block🔥10 :block:magma:10 :dmg:water:7 |
• Other weapons that can be used because they contain some mixture of these elements are:
:block:physical:16 :dmg:wind:6 |
:block:physical:10 :dmg:wind:7-9 |
:block:dark:25 :heal: 55 |
:block:dark::block🔥15 :heal: 50 :dmg🧊:dmg:water::dmg:wind:6-13 |
:block:dark:15 |
:block:dark::block🔥10 :dmg:water:3-7 |
:block:dark::block🔥6 |
:block:dark::block🔥:block:magma::block:water:5.5 :heal: 45 :dmg🧊:dmg:wind:3-12 |
:block🔥25 :heal: 50 |
:block🔥12 :dmg:water:18 |
:block🔥:block:magma:7 :heal: 45 |
:block🔥:block:magma::block:water:6 :heal: 75 :dmg🧊:dmg:water::dmg:wind:4-6 |
• The choice of which mod crystals to use is up to you! Personally, I would attach crystals that add defensive icons (:block:physical::block:dark::block🔥:block:magma::block:earth:) to decrease the amount of damage you are taking in per turn. You don't have to worry about freezing or stealing here so crystals that defend against those aren't necessary.
• Finally, for the choice of an infinite use scroll, we need to find something that blocks the most common icons on the hydra's weapons:
Feather Explosion :block:physical:23 :dmg:wind:5-8 :heal: 7% 20 AP |
Divine Denizhen :block:physical:3 :block:dark:3 :block🔥3 :block:magma:3 :block:earth:3 :block:water:3 :heal: 5% 7 AP |
Protector of the Rich :block:physical:11 :block🔥10 :heal: 7-8% 18 AP |
Aftershocks :block:physical:5 :block:dark:5 :block:earth:7 :heal: 7% 15 AP |
I would prioritize one of these scrolls because they have good defensive coverage and can heal (:heal:) you each turn. Remember that Divine Denizhen can be made more cheaply at the Secluded Shrine and Protector of the Rich can be made through tattered scroll pieces.

This dinosaur with blades for hands??? is recommended for pets at tier 7 or higher.
• Mortaurus mostly uses physical (:dmg:physical:), earth (:dmg:earth:), dark (:dmg:dark:), and wind (:dmg:wind:) attacks.
:block:physical:13 or 27 |
:block:physical:15 :block:earth:20 :heal: 40 |
:block:physical:8 :block:dark:17 |
:block:physical:18 :block:wind:18 :heal: 3-27% |
:block:physical:10 :block:wind:10 |
:block:earth:45 :heal: 60 |
:block:earth:15 :block:dark:15 |
:block:earth:9 :block:dark:9 :heal: 85 |
:block:earth:18 :block:wind:18 |
:block:dark:30 :heal: 70 |
:block:dark:35 |
:block:wind:25 |
• There's no freezing or stealing here so mod crystals can be used to either add to your defense or your offense. Remember that we want to block :block:physical::block:earth::block:dark::block:wind: if you need more defense on your weapons. If you'd rather go for more offense, he does not block dark, magma, water, or wind attacks (:dmg:dark::dmg:magma::dmg:water::dmg:wind:).
• For our infinite use scroll, we want to pick one that will help block this opponent's icons:
Feather Explosion :block:physical:23 :heal: 7% |
Aftershocks :block:physical:5 :block:earth:7 :block:dark:5 :heal: 7% |
• There's no freezing against this guy so, to fill out your scroll set, you can either use blocking or healing scrolls:
Cobalt Eternal :block:physical::block:earth::block:dark::block🔥 8 AP |
Gigan Blow :block:earth: 7 AP |
Fatal Fire :block:dark::block🔥 10 AP |
Lucky :block:dark: :heal: 19 AP |
Typhoon of Valor :block:wind: 7 AP |
Sticky Webs :heal: 199 HP :block🔥:block:earth::block:magma: 14 AP |
Morosbane :heal: 300 HP 15 AP |
Lucky :heal: 500 HP :block:dark: 19 AP |
Gigan Blow and Typhoon of Valor Scrolls can be made more cheaply at the Secluded Shrine. Morosbanes are usually the gold standard for smaller pets who need scrolls that heal and attack at the same time, but with their price increase over the last few years, Sticky Webs has become a cheaper alternative.
I'm still not entirely sure what a pylot is, but it's recommended for pets at tier 7 or higher.
• The version of Pylot is very straightforward and only uses four elements: wind (:dmg:wind:), magma (:dmg:magma:), physical (:dmg:physical:), and earth (:dmg:earth:).
:block:wind:40 :heal: 70 |
:block:wind:25 |
:block:wind:18 :block:physical:18 :heal: 3-27% |
:block:wind:18 :block:earth:18 |
:block:wind:12 :block:magma:12 |
:block:wind:10 :block:physical:10 |
:block:wind:9 :block:magma:9 :heal: 85 |
:block:magma:15 or 40 |
:block:magma:12 :heal: 100 |
:block:magma:7-8 :heal: 95 |
:block:physical:13 or 27 |
:block:physical:15 :block:earth:20 :heal: 40 |
• You don't have to worry about any freezing or stealing here so mod crystals are up to you. You can either add more defense (:block:wind::block:magma::block:physical::block:earth:), or more offense. He doesn't block any icons so you can pick anything if you want to add more attack.
• For our infinite use scroll, we want to pick one that will help block this opponent's icons:
Feather Explosion :block:physical:23 :heal: 7% |
Aftershocks :block:physical:5 :block:earth:7 :heal: 7% |
If you choose to use Feather Explosion, that will cover your physical defense (:block:physical:). I would then pair it with two of the weapons listed above that will help block the other three elements (:block:wind::block:magma::block:earth:) like Music Note Axe and Pylot War Hammer, for example.
• One last thing I've noticed about this challenger is that its Pylot Stampede (:dmg:physical::dmg:earth:) attacks are only once per battle. It seems to only have a few of them and uses them early in the battle, which means for the rest of the battle you really only need to worry about wind, magma, and physical icons, as the earth icons leave the battle quite quickly. You may even want to save your blaster(s) until they’re gone, then blast one or two of his remaining Pylot Cleave to make the battle even easier.
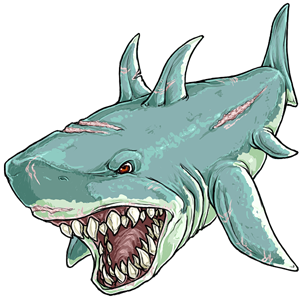
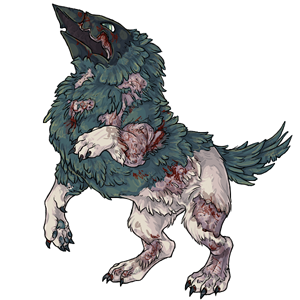
This angy shark is recommended for pets at tier 9 or higher, but can be attempted at tier 8.
Highest Priority ---> Lowest Priority |
:block:water: :block🧊 :block:physical: :block:earth: :block:dark: :block:light: :block🔥 :block:wind: |
• Bonesaw mostly uses water and ice attacks (:dmg:water::dmg🧊) and fortunately this is a pretty common defensive combo.
* :block:water:50 :block🧊50 :heal: 8% |
:block:water:40 :block🧊40 :heal: 100 |
:block:water:35 :block🧊35 :heal: 75 |
:block:water:60 :block🧊:block:wind:15 |
:block:water:18 :block🧊18 |
:block:water::block🧊 :block🔥8 :heal: 120 |
Next I would pair one of the above weapons with a physical blocker (:block:physical:).
:block:physical:100 |
* :block:physical:50 :heal: 7-9% |
:block:physical:35 :block:dark::block:light::block🔥20 :heal: 75 |
:block:physical:35 or 60 :heal: 0 or 20% |
:block:physical:30 :block:earth:35 :heal: 100 |
:block:physical:15 :block:earth:20 :heal: 40 or 70 |
* Note that Sebastian Phoenix Saber and Calvin Blackmoons Sword cannot be paired together because they both take the healer slot.
• Be sure to add freezing protection to your weapons with your mod crystals. If you have some open slots left, you can add more defense by prioritizing :block:water::block🧊:block:physical::block:earth::block:dark: or you can add more attack with elements that he does not block (:dmg:physical::dmg🔥:dmg:earth::dmg:light::dmg:magma::dmg:wind:).
80% freeze protection |
80% freeze protection |
• Finally, we have a few infinite use scrolls that can work well here:
Ocean Currents :block:water:12 :block🧊12 :heal: 8% |
Skelly :block🧊8 :block:dark:8 :block:light:8 :heal: 8% |
Aftershocks :block:physical:5 :block:earth:7 :block:dark:5 :heal: 7% |
Feather Explosion :block:physical:23 :heal: 7% |
Ocean Currents is obviously going to be a good pick because of its water and ice defense, though it uses some water (:dmg:water:) attack, which he'll block with his scroll. Feather Explosion is an inexpensive option that will also work, and Skelly or Aftershocks can help block multiple elements at once.

Vintage Prodigy is a weaker version of his newer counterpart and is recommended for pets at tier 10 or higher.
Highest Priority ---> Lowest Priority |
:block:water: :block:dark: :block🔥 :block:light: :block:magma: :block:wind: :block:earth: :block🧊 |
• Vintage Prodigy has the exact same weapon setup as regular Prodigy. He mostly does water and dark attacks (:dmg:water::dmg:dark:), but also commonly uses fire, light, magma, and wind (:dmg🔥:dmg:light::dmg:magma::dmg:wind:).
:block:water:65 :block:light:65 :heal: 9% |
:block:water:65 :block:light:65 |
:block:water:40 or 85 :block:light:40 or 85 :block:wind:40 or 85 |
:block:water:35 :block🔥35 :block:light:35 |
:block:dark:75 :block:magma:65 :heal: 8% |
:block:dark:55 :block:magma:55 :block:light:0 or 50 :heal: 0 or 140 |
:block:water::block:dark:33 :block🔥:block:magma:27 :heal: 300 |
:block🔥100 :block:light:33 :heal: 8% |
:block🔥75 :block:magma:25 |
:block🔥20 :block:magma:20 :block:earth:20 |
:block:light:45 :block:magma:45 :heal: 130 |
:block:dark::block🔥:block:magma: :block:wind::block:earth:30 :heal: 8% |
If you decide to go with weapons other than the ones I have listed, try to avoid those with water attack icons (:dmg:water:) because he blocks those pretty consistently.
• As you'll notice, it's kind of difficult to get full defensive coverage from all of his possible attacks. This is where mod crystals can help. He can freeze so be sure to equip a few Parched Baguette Crystals, but the rest of your mod slots can be used to beef up your defense. Whichever element you couldn't block with your weapons would be a good choice to add (:block:water::block:dark::block🔥:block:light::block:magma::block:wind:).
80% freeze protection |
80% freeze protection |
• For our choices of infinite use scroll:
Ocean Currents :block:water:12 :block🧊12 :heal: 8% |
Tasselled Aegis :block:dark:25 :heal: 9% |
Protector of the Rich :block🔥9-12 :heal: 7-8% |
Retribution :block🔥12 :heal: 180 HP |
Strength of the Paramnesia :block:magma:11 :block🧊12 :heal: 9% |
Aftershocks :block:dark:5 :block:earth:7 :heal: 7% |
Lots of options here. Ocean Currents may not be the ideal pick because it uses a lot of water attack, but its defense works nicely. Protector of the Rich can be earned yourself from tattered scroll pieces and Retribution can be used if you're on a budget.
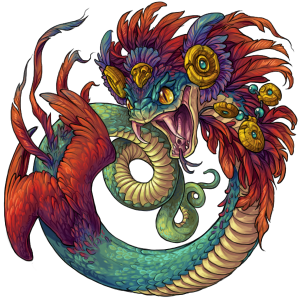
This fancy snake is recommended for pets at tier 10 or stronger.
Highest Priority ---> Lowest Priority |
:block:wind: :block:light: :block:water: :block:dark: :block🧊 :block:physical: :block🔥 |
• Cozcoatl's main element is wind (:dmg:wind:) and he uses a lot of it. I would absolutely prioritize picking a wind blocker (:block:wind:) as your first line of defense.
:block:wind:100 :heal: 7% |
:block:wind:100 :heal: 0 or 1,000 |
:block:wind:60 :heal: 175 |
:block:wind:40 :block:water:40 :heal: 7% |
:block:wind:35 :block🧊35 :heal: 10% |
:block:wind:30 :block:dark:30 :block:physical:30 :block🔥30 :heal: 8% |
He also deals a lot of light and water (:dmg:light::dmg:water:) so I paired my wind blocker with a second weapon that blocked those.
:block:light:65 :block:water:65 :heal: 9% |
:block:light:65 :block:water:65 |
:block:wind:40 or 85 :block:light:40 or 85 :block:water:40 or 85 |
:block:light:60 or 75 :block:water:0 or 45 or 75 :heal: 8 or 5 or 2% |
• There's no freezing or stealing here so you can opt for either more defense or more attack with your mod crystals. If you need more defense, aim for crystals that add :block:wind::block:light::block:water::block:dark:. If you want more attack, he blocks earth and light (:dmg:earth::dmg:light:) the least.
• Our infinite use scroll choices are pretty straightforward:
Skelly :block:light:8 :block:dark:8 :block🧊8 :heal: 8% |
Ocean Currents :block:water:12 :block🧊12 :heal: 8% |
Aftershocks :block:dark:5 :block:physical:5 :heal: 7% |
Triple Threat :block:wind:12 :block🧊12 :block🔥12 :heal: 7% |
• Since freezing is disabled, we can fill up the rest of our scroll set with blocking or healing scrolls. These can help you stay alive longer against this annoying challenger.
Typhoon of Valor :block:wind: 7 AP |
Sancturia Exodin :block:light::block:water::block:physical::block🔥 8 AP |
Emerging Rifts :block:light::block:dark: :heal: 13 AP |
Fatal Fire :block:dark: 10 AP |
Lucky :block:dark: :heal: 19 AP |
Cobalt Eternal :block:dark::block🧊:block:physical::block🔥 8 AP |
Morosbane :heal: 300 HP 15 AP |
Lucky :heal: 500 HP 19 AP |
Gift of the Forj :heal: 1,500 HP 15 AP |
• One last tip about Cozcoatl is that he has weapons that boost his stats. So, what does this mean? It means the longer the battle goes on, that harder he becomes to beat. I opted to try and defeat him more quickly by using weapons that generated curses. Curses cause unblockable damage so they are slightly more preferable over bombs, which he has the potential to block.
17 icons 5 turns |
12 icons 7 turns |
8 icons 9 turns |
6 icons 20 turns |
2 or 6 icons 8-15 turns |
I used three of these in place of my freezer and blasters to help the battle go more quickly. It can be a little risky, but faster battles are usually more beneficial when it comes to this guy.
This sea monster is recommended for pets at tier 12 or higher, but can also be attempted at tier 11.
Highest Priority ---> Lowest Priority |
:block:water: :block:dark: :block🧊 :block:physical: :block:earth: :block:wind: :block🔥 :block:light: :block:magma: |
• The main weapon you need for Crawbeast is something that blocks water (:block:water:). The higher the water blocking, the better, as he can deal out a lot of it. You can even use two of them if you need to.
:block:water:125 :block:dark:55 |
:block:water:75 |
:block:water:75 |
:block:water:60 :block🧊60 |
:block:water:45 :block:earth:45 |
:block:water:44 :block🔥44 |
If you're satisfied with your water blocking and still need another weapon, I would pick one that blocks dark, ice, physical, or earth (:block:dark::block🧊:block:physical::block:earth:) as those are his next most common elements.
:block:dark:45 or 50 :block🧊45 or 50 |
:block:dark:30 :block🧊30 :block:light:30 :block:magma:30 |
:block🧊35 :block:earth:35 :block:wind:35 |
:block🧊40 :block:wind:40 :block🔥40 |
:block:earth:40 :block:wind:40 :block🔥40 :block:dark:0 or 30 :block:physical:0 or 30 |
:block:water:33 :block:dark:33 :block:physical:27 :block🔥27 :block:magma:27 |
• When modding your weapons, you'll want to use crystals that help protect against being frozen.
80% freeze protection |
80% freeze protection |
I would dedicate at least half of your mod slots to freeze protection. I chose to fill the other half with attack crystals. He does not block fire, light, or magma (:dmg🔥:dmg:light::dmg:magma:) and equipping attack crystals of those elements can help the battle go faster.
• Solid choices for your infinite use scroll are:
Ocean Currents :block:water:12 :block🧊12 :heal: 8% |
Strength of the Paramnesia :block🧊12 :block:physical:11 :block:magma:11 :heal: 9% |
Aftershocks :block:dark:5 :block:physical:5 :block:earth:7 :heal: 7% |
Feather Explosion :block:physical:23 :heal: 7% |
Triple Threat :block🧊12 :block:wind:12 :block🔥12 :heal: 7% |
Any of these will do; they'll all block some of his icons and heal you each turn. Strength of the Paramnesia and Aftershocks also use some light and magma attack (:dmg:light::dmg:magma:), respectively, which he does not block.
Gelatin Stomper
[box=lightgreen]Gelatin Stomper[/box]
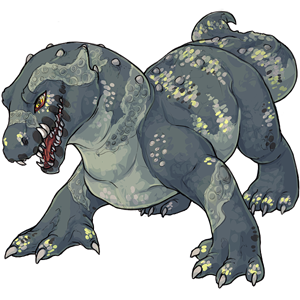
Arguably everyone's least favorite gelly :P He is recommended for pets that are at least tier 12.
Highest Priority ---> Lowest Priority |
:block:earth: :block:physical: :block:light: :block🧊 :block:water: :block:wind: |
• There is one main strategy for this guy and that is steal protection. Freeze protection is very important too, but if your weapons are all stolen, you're in for much more trouble.
:block:earth:100 :block:light:0 or 23 |
:block:physical:200 |
:block:earth:130 :block🧊45 |
:block:light:45 :block🧊130 |
:block:light:40 |
All of these weapons provide some amount of protection against stealing. The Ether and Natasha generate weapons that become steal fodder, and Ornamented Hook Swords, Oracles Staff, and Sandreaver each have blessings that prevent stealing. They also all block either earth, physical, light, or ice icons, but that is secondary in importance. You're going to want to use at least one of these, or two if you have them, to protect against the high amount of stealing that this gelly can do.
• Now that you've picked one or two of the weapons above, you may want to find other constant(s) for your set. Ideally they will be something that blocks some mixture of the Stomper's attack.
:block:earth:125 :block:physical:50 |
:block:earth:85 :block:light:85 |
:block:earth:45 :block:light:130 |
:block:earth:35 :block🧊35 :block:wind:35 |
:block:earth:45 :block:water:45 |
:block:physical:40 or 60 :block🧊40 or 60 |
:block:light:65 :block:water:65 |
:block:light:30 :block🧊30 |
:block🧊125 :block:water:25 |
:block🧊60 :block:water:60 |
The weapons above would be my first choices for complementing your other weapon(s) with stealing protection. If your pet is on the lower end of tier 12, you may want to use the more expensive stuff because it is generally stronger. No matter what you pick, make sure you're using something that blocks earth (:block:earth:) because that is the element that appears in every one of his attacks.
• The mod crystals to use here are straightforward because you'll want to protect yourself against this opponent's high rates of stealing and freezing.
80% freeze protection |
100% steal protection |
50% freeze & steal protection |
• Lastly, there are quite a few options we can use for our infinite use scroll.
Strength of the Paramnesia :block:physical:11 :block🧊12 :heal: 9% :dmg:earth:9 :dmg:light:6 |
Swift Blade :block:earth:17 :heal: 7% :dmg🔥6-8 |
Feather Explosion :block:physical:23 :heal: 7% :dmg:earth:5 |
Aftershocks :block:earth:7 :block:physical:5 :heal: 7% :dmg:earth:10 |
Ocean Currents :block🧊12 :block:water:12 :heal: 8% |
Unstable Fairy :block🧊0 or 30 :heal: 0 or 10% |
What you end up using is entirely up to you. However, there are a few options that might be preferable because they use icons in their attacks that the Stomper does not block (:dmg🔥:dmg:earth::dmg:light:).
Thanks for this writeup, ! This is helpful information! I know it's a lot of work and I appreciate it.
[img align=center]https://www.imagecoast.com/images/brokensafety/brokenav.gif[/img]
Some other weapons that are missing for the stomper:
- highly recommend as this will not only block physical, but also has a blessing that blocks water and the potential to steal back weapons you might have lost
blocks water but this also has the ability to steal weapons. Combining with the gelatin sword increases your odds of stealing fodder or stealing back other weapons from your set.
this is a strategic weapon in place of the ether. Yes it's T7 but it's function is to generate steal fodder. This would be a third weapon to add in the battle that is way cheaper than the ether but could also be used with the ether or Natasha to overwhelm the stomper with fodder. The only thing is that you can't use it with the gelatin sword since they are both labeled as healers.
I highly recommend bringing in two main attackers, followed by 1-2 secondary attackers as there is always a chance for the stomper to steal something that isn't fodder if your blessings aren't activated
thank you so much for this, it's so handy! hoping to hit 5 wins with cozcoatl on my t10 battler before the challengers disappear so this is great definitely need to start investing more in AP though T_T the hubris of not making my book pet my battle pet lmao

This is amazing, thank you so much! I had an aha moment reading this guide, I have not been switching weapons to match the enemy in the Coliseum before. Have been whittling down the Mini Gelatin much more efficiently after doing a new weapon set, and at T2 it even seems like I could get to maximum wins, it would (will??) just take foreeeveeer 😂
Good luck! I believe in you! And yeah, it sucks learning too late that your battle pet also needs a ton of books :(
That's wonderful! 🎉 Good job!!! :D
I'm glad it helped! Learning blocking and changing your weapons to match the opponent is like 80% of battling. Once you master that, you're golden :P
Thank you for your hard work! This is extremely helpful!
|
I think I'm finally done editing this guide, so here you go! Hope it helps :) If anything needs to be fixed, just give me a ping.
Remember that we have until March 8th to battle them. With Survival just around the corner, don't forget to also get your battles in!
Thank you soooo much for all this work you always share with us! It is a godsent, when often we have so little time to fight - and can't afford to strategize too much on our own. The weapon spreadsheet is kind of the best of all your goodies!!!!
Thank you for the date reminder!! I've still got some battles to do!
Wanna know more about battling? ❤️ The Official Battle Guide v3.3 ❤️ Need to find books? 🌈 The Book Grind Guide v1.0 🌈
Thanks for writing such a great guide Jess! Will definitely be referring to this when I get the chance to properly battle <3
Thanks for all the work you put into your Guide have found it most useful :)
[tree=LadySaphira [Dance=LadySaphira]
I don't really need this, other than the loot portion, but I'm grateful you made this. It's really nice all that you do for the battling community.
Paramnesia
The unmatched power of the distortion of memory, arcane magic, and artisanal cheeses!
Realizing I need more mula for some of these recommended weapons. tears
Believe me, I tried to include affordable stuff in each section as much as possible :P Remember that you can search items on SubetaLodge and see if there’s a cheaper way to get them. Like, many of the weapons are r170, which means they’re 5th win challenger loot, and some of the scrolls can be made at the Secluded Shrine.
If all else fails we have a thread for borrowing stuff and many battlers are always happy to help: :dmg:physical: Weapons - Borrowing & Lending :dmg:physical:
Other weapon missing from Crawbeast:
- blocks some water and ice damage that crawbeast also deals. It also has a curse that can disable one enemy weapon. This is extremely useful to help stop him from using two of his death rolls and overheal or if you are frozen to lessen the damage he deals. blocks some earth icons that crawbeast can also deal. Most important is the boost to stats. This is very useful if you are on the cusp of outspeeding crawbeast or not far into T12 and need more stats to deal more damage.
- blocks earth and physical damage. Both again secondary icons on crawbeast. The blessing will also block damage across all icons
Any of these weapons above can be used with a heavy water blocker like the ones listed in the second post
water blocker missing from the list super budget friendly for T11 and better than compared to attack damage and healing. Also defends more water and heals more opposed to
I'll swap in the Dagger for the Axe since the element blocking change between fire and wind shouldn't make a meaningful difference. I agree that the +3% healing is better, and the light attack icons are more suitable for Crawbeast.
Prodigys Eyeball is staying though. Its attack uses a majority of fire and light, which he doesn't block, and it has a curse. It also scales to block 45 water for T11+ - that's more than the Dagger - and his Headbutt can do quite a big earth attack.
As for the other weapons, these older opponents use a lower amount of a lot of different elements (Crawbeast uses all 9) so I opted for mostly triple blockers to accompany the water blockers. Many of them are also buyable and therefore easier to obtain. Big blockers are fine, but I think blocking more elements is advantageous in these cases.