A Guide to Rotten Paladin Challengers [Updated]
Replies
Each subsequent challenger is unlocked through an achievement prize after defeating the previous one ten times.
Fun loot to collect:
Since freezing is disabled for all three challengers and we can't battle them the easy way, I'm going to be as thorough as I possibly can regarding what you should use to win.
Time Forgotten Armor
[box=khaki]Time Forgotten Armor[/box]
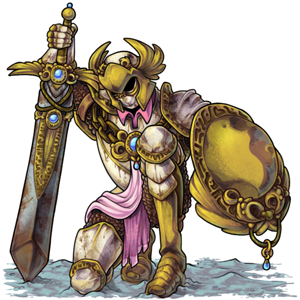
This challenger is first in the set and can be unlocked with the Golden Brooch from the Cash Shop. It is recommended for pets at tier 7 or higher.
• Thanks to the recent weapon revamp, this opponent should (hopefully) be less of a struggle for T7 pets. Its main icon types are light (:dmg:light:) and dark (:dmg:dark:), which are used on all of its weapons and one of its scrolls. I recommend picking two constant attackers that when used together will block both elements.
:block:light:30 or 40 or 50 |
:block:light:20 :heal: 70 HP |
:block:light:15 :block:dark:15 :block:earth:15 |
:block:light:15 :block:wind:15 |
:block:light:12 :block:physical:12 :block:earth:12 |
:block:dark:75 |
:block:dark:35 |
:block:dark:30 :heal: 70 HP |
:block:dark:16 :block:earth:16 |
:block:dark:15 :block:physical:15 |
• For mod crystals, you can add more protection against light (:block:light:) or dark (:block:dark:) icons if you wish, but it may also be a good idea to include some protection against physical (:block:physical:) and wind (:block:wind:), which are the next most common. Sluggish Slash and Wistful Thoughts can deal an annoying amount of physical and wind damage that you may want to help block with your crystals if they're not already included in your chosen weapons' base stats.
• In terms of infinite use scrolls, the two simplest picks for this challenger are Aftershocks or Feather Explosion. Either of them will work, it really just depends on your budget.
Aftershocks :block:dark:5 :block:physical:5 :block:earth:7 :dmg:earth:10 :dmg:magma:6 :heal: 7% 15 AP |
Feather Explosion :block:physical:23 :dmg:wind:5-8 :dmg:earth:5 :heal: 7% 20 AP |
• When freezing is disabled, it can be a good idea to fill the rest of your scroll set with either defensive scrolls or healing scrolls.
Sancturia Exodin :block:light:15 or 75 :block:physical:15 or 75 8 AP |
Cobalt Eternal :block:dark:15 or 75 :block:physical:15 or 75 8 AP |
Spacial Abyss :block:physical:75 :block:wind:75 18 AP |
Lucky :block:dark:75 19 AP |
Lucky :heal: 500 HP 19 AP |
Gift of the Forj :heal: 1,500 HP 15 AP |
Morosbane :heal: 300 HP 15 AP |
The healing scrolls can be helpful when your health gets low. Each of them also has some amount of light attack, which is a good bonus because that is one of the two icons types (:dmg:light::dmg:wind:) this opponent doesn't have a chance of blocking.
• All three challengers in this series have a chance of disabling one of your weapons. For this opponent specifically, you'll want to keep an eye out for the Tainted Memories curse, which is indicated by an image under your pet when it's activated in battle ( ). When one of your weapons is disabled, it's a good idea to use either a defensive scroll to make up for the lost defense, or a healing scroll to make up for the anticipated lost health. For instance, if you can only use Panzer Hydra Blade (:block:light:) on the next turn, you can pair it with Cobalt Eternal Scroll to make up for the lost dark defense (:block:dark:).
Reanimated Vengeance
[box=pink]Reanimated Vengeance[/box]
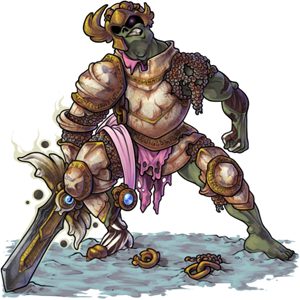
This challenger is second in the set and can be unlocked with the Rusted Golden Brooch earned from defeating Time Forgotten Armor ten times. It is recommended for pets at tier 10 or stronger.
• Tier 10 has some great multi-element blocking weapons for this challenger, whose main icons are dark, magma, earth, and fire (:dmg:dark::dmg:magma::dmg:earth::dmg🔥). Also present are some physical and ice (:dmg:physical::dmg🧊) attacks, but to a lesser extent.
:block:dark:75 :block:magma:65 |
:block:dark:55 :block:magma:55 |
:block:dark:45 or 50 :block🧊45 or 50 |
:block:dark:33 :block:earth:100 |
:block:dark:33 :block:magma::block🔥:block:physical:27 |
:block:magma:65 :block🧊65 |
:block:magma:60 :block🧊60 |
:block:magma:25 :block:earth:25 |
:block:earth:45 :block:physical:40 |
:block:earth:35 :block🧊35 :block:wind:35 |
Other single element blocking weapons that are good to use against this challenger include:
:block:dark:100 |
:block:dark:55 |
[item=Item Hunters Whip ] :block:magma:125 |
[item=Trusty Blades ] :block:magma:65 |
:block:earth:75 |
:block:earth:40 |
• I recommend combining two weapons that will block at least three of these elements to provide as much coverage as possible. For example, pairing Insektdammerung and Unstable Sample Syringe together in your set would cover dark, magma, and ice (:block:dark::block:magma::block🧊). I would then select mod crystals or scrolls to cover the remaining earth and fire icons (:block:earth::block🔥).
• The speed of this challenger is quite high for T10 pets so I opted for defensive crystals. Ones that add :block:dark::block:magma::block:earth::block🔥 can be useful to fill in the icon types you're not blocking with your weapons. If you're interested in attack crystals instead, this opponent also does not block ice, magma, water, or wind icons (:dmg🧊:dmg:magma::dmg:water::dmg:wind:) if you'd rather add those.
• For the choices of which infinite use scroll to use:
Aftershocks :block:dark:5 :block:earth:7 :block:physical:5 :dmg:magma:6 :heal: 7% 15 AP |
Holy Deluge :block:magma:8 :block:earth:8 :block🔥8 :dmg:water:4 :heal: 10% 15 AP |
Triple Threat :block🔥10 or 15 :block🧊10 or 15 :block:wind:10 or 15 :heal: 7% 18 AP |
Aftershocks is going to be the gold standard here with its ability to block two of this opponents main three elements (:block:dark::block:earth:) and its magma attack icons (:dmg:magma:), which aren't blocked by this opponent. Triple Threat is a decent option, but it blocks mostly secondary elements and isn't as useful. Holy Deluge is the best budget option and is cheaper if you make it yourself.
• When looking for other scrolls to add to your set, I would again opt for defensive scrolls or healing scrolls. Not being able to freeze your opponent means you're going to be attacked far more often and you'll want to protect your health.
Cobalt Eternal :block:dark::block:physical:15 or 75 :block:earth::block🔥:block🧊15 or 75 or 75 8 AP |
Fatal Fire :block:dark::block🔥75 10 AP |
Spacial Abyss :block:magma::block:earth::block🔥:block:physical::block🧊:block:wind:75 18 AP |
Lucky :block:dark:75 19 AP |
Oblivijhen :block:magma:75 7 AP |
Gigan Blow :block:earth:50 6 AP |
Perilous Whirlpool :block🔥75 7 AP |
Arctic Braver :block🧊75 7 AP |
Lucky :heal: 500 HP 19 AP |
Gift of the Forj :heal: 1,500 HP 15 AP |
Morosbane :heal: 300 HP 15 AP |
• Similar to the other opponents, this one has a curse called Unending Torment which will disable one of your weapons for two turns. You'll see an image under your pet if it becomes active ( ). When your second weapon is disabled during battle it can be wise to switch from your infinite use scroll to one that either has high defensive coverage or heals your pet in order to survive those turns.
Final Corruption
[box=burlywood]Final Corruption[/box]
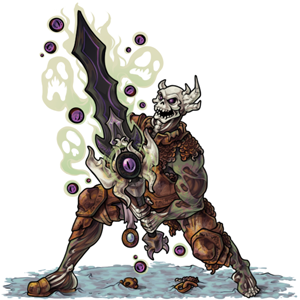
This is the final challenger in the set and can be unlocked with Corrupted Eye Brooch after defeating Reanimated Vengeance ten times. It is recommended for pets in at least tier 12.
• The main strategy for this opponent is using a dark (:block:dark:) and a wind (:block:wind:) blocker as your constants. Each of its weapons and scrolls does some amount of dark attack (:dmg:dark:) and blocking that is a necessity. The next most common icon type is wind (:dmg:wind:), of which it deals a significant amount with its Shrill Shriek weapon.
:block:dark:130 :block:wind:40 |
:block:dark:130 :block:earth:45 |
:block:wind:130 |
:block:wind:100 |
With freezing disabled and the high health of this challenger, you need to block these two icon types if you want to live long enough to win.
• The upside to opponents who have freezing is disabled is that your mod slots are freed up and you can use virtually anything you'd like. One option is to add more dark and wind defense. This can be helpful on the turns where one of your weapons becomes disabled. But I also think crystals which block light (:block:light:) and magma (:block:magma:) can be helpful here. Those are the next most common so, if you feel your dark and wind defenses are solid, you can opt for blocking those instead.
If you'd rather use attack crystals, this opponent also does not block earth (:dmg:earth:), fire (:dmg🔥), light (:dmg:light:), or magma (:dmg:magma:) icons. Adding any of those will help bolster your damage.
• The best infinite use scrolls to use against this opponent are:
Strength of the Paramnesia :block:magma:11 :block🧊12 :block:physical:11 :dmg:earth:9 :dmg:light:6 :heal: 9% 21 AP |
Aftershocks :block:dark:5 :block:physical:5 :block:earth:7 :dmg:earth:10 :dmg:magma:6 :heal: 7% 15 AP |
Skelly :block:dark:8 :block:light:8 :block🧊8 :dmg:earth:4 :heal: 8% 14 AP |
Tasselled Aegis :block:dark:25 :dmg:earth:6 :dmg🔥6 :heal: 9% 15 AP |
Mana Surge :block:magma:25 :dmg🔥11 :dmg:light:6 :dmg:magma:6 :heal: 9% 15 AP |
Triple Threat :block:wind:10 or 15 :block🧊10 or 15 :heal: 7% 18 AP |
These are fairly straightforward. They all block this opponent's icons to some extent (:block:dark::block:wind::block:magma::block:light::block🧊:block:physical::block:earth:) and most have icons that the opponent doesn't block in their attack (:dmg:earth::dmg🔥:dmg:light::dmg:magma:). Plus, they heal (:heal:) you at the same time. Ranked from left to right, the one I would most recommend is listed first.
• Since we can't freeze, we have a few options for other scrolls to put in our set:
Fatal Fire :block:dark:75 :dmg:light:11 :dmg🔥13 10 AP |
Lucky :block:dark:75 :dmg:light:50 19 AP |
Emerging Rifts :block:dark:50 :dmg:light:13-14 13 AP |
Cobalt Eternal :block:dark:15 or 75 8 AP |
Energy of the Paramnesia :block:dark:85 :dmg:light:32 31 AP |
Typhoon of Valor :block:wind:75 7 AP |
Spacial Abyss :block:wind:75 18 AP |
Energy of the Paramnesia :block:wind:85 31 AP |
Gift of the Forj :heal: 1,500 HP 15 AP |
Lucky :heal: 500 HP 19 AP |
Rage of the Paramnesia :heal: 5,000 HP 75 AP |
• Healing scrolls will obviously come in handy when your health gets low. There is reason to use blocking scrolls though. Final Corruption has a small chance to activate Death Conquers All, which will disable one of your weapons on the next turn. When you notice the curses's image ( ) pop up under your pet, it is a good idea to block the complementary icon type that your lone active weapon is not defending. For instance, if you use Maniacal Essence (:block:dark:130) on that turn, it would be a good idea to use Typhoon of Valor (:block:wind:75) as your scroll and vice versa. This will help you keep those icons covered in case Shrill Shriek is used on the next turn.
You're the real MVP Jess, thank you!
| [flower=Damon] | [tot=Damon]
Lucky also attacks with 50 light which it doesn't block. I went with Trident over Sword for wind block. The blessing blocks magma (also earth and water but that's less of a thing here).
Paramnesia
The unmatched power of the distortion of memory, arcane magic, and artisanal cheeses!
I have to put my 2 cents in here, because it was soooo flabbergasting.
My ME is lent out, so I went with Chancellors War Shield just for fun, thinking I wouldn't even last through the first battle and definitely miss a second attacker. I expected this sword to be kind of almost unobtainable - even though, looking at the (current?) stats with minute heal and no curses/blessings it definitely isn't a Godly and NOT comparable to Sandreaver ... Plus it's sad it's still an achievement prize, that cannot go into treasures or wardrobe, if you want it in your armory.
Well, it was the easiest thing to get all ten wins in at full health - didn't even bother to change my modding crystals or use potions.
My staples for blessings and curses (for defence and speed up battles): Mecha & Captured Eternal Flame - paired with a Void Scroll
Then Soma and Recycle Blaster to perhaps give me a tad of a chance, paired with a second Void (I didn't have much time, so didn't pay a lot of attention, but didn't catch a turn, when Pillbox or Wad were used...)
Even though Trident is my staple I chose Swahbuckle this time because of stronger defence and healing paired with Strength of the Paramnesia (my new scroll staple over beloved Tasseled)
In slot 7&8 I kept my backup staples (life savers or just end of battle speed up): Nachos Secret Stuff and Thunderball plus a couple of Lucky and GotF - if I should need healing or attack support. I was done in no time and all precautions and fears unnecessary.