A Guide to Super/Paramnesia Opponents [Updated]
Replies
If you're unfamiliar, the paramnesia opponents are basically supercharged versions of their regular counterparts. They're endgame opponents and recommended for pets at tiers 12 and 13.
In terms of difficulty, I would rank them from easiest to most difficult as:
Upon reaching your fifth and tenth wins, you'll earn a tome and each challenger's respective tattered scroll piece. Because the scroll pieces are achievement-bound, you can earn the necessary wins with multiple pets, but you'll only ever be able to earn two copies of each. You only need to earn five wins on each opponent to unlock the Paramnesia forum title.
[box=pink]On to strategy...[/box]
• Each of them can be frozen EXCEPT for Paramnesia Cursed Irion. This is the most important piece of advice because how many freezing scrolls you can equip will determine how much difficulty you'll have with these challengers. Most of them can freeze you and have a high chance to do so. Stealing is also disabled for all.
• The next most important piece of advice is to bring in your blasters. Recycle Blaster and Soma Tablets will make the battles much easier. Most of these opponents' weapons can deal massive damage and giving yourself some breathing room by blasting two of them into junk can make a big difference.
• The rest of this guide will focus on which weapons, mod crystals, and scrolls to use when your opponent is unfrozen. If any of the terminology is confusing, you can read more about how battling works here and here (sections 3.4 and 3.5), or feel free to ask for help.
• Because these are endgame challengers, budget weapons often won't be as useful as the more expensive ones. The higher your pet's stats and AP, the likelier it is you can get away with the budget options. But once the opponent is unfrozen, it's going to be much harder to stay alive if you aren't using weapons that block a lot of icons. If you want to look through more options that I didn't mention, try here and here. Should you ever need to borrow anything, you can find help here.
[box=pink]The guides ~[/box]

• Each of its weapons deal water (:dmg:water:) icons, with physical (:dmg:physical:) and dark (:dmg:dark:) icons being the next most common.
:block:water:130 :block:wind:45 |
:block:water:125 :block:dark:55 |
:block:water:75 |
:block:water:75 |
:block:physical:200 |
:block:physical:110 :block:dark:0 or 65 |
:block:physical:75 |
:block:physical:50 :block:earth:125 |
:block:dark:130 :block:earth:45 |
:block:dark:130 :block:wind:40 |
:block:dark:75 |
:block:dark:50 or 65 or 80 :block:earth:50 or 65 or 80 |
:block:dark:45 or 50 |
• The ideal two choices for this challenger are going to be Manifesting Weapon and The Ether with their solid defending of all three of these elements. However, you can make other choices work as well by beefing up their defenses with defensive crystals. If you're looking to increase your attack instead, Para Tide does not block fire (:dmg🔥), magma (:dmg:magma:), or wind (:dmg:wind:) icons. Something like Singed Baguette Crystal would be a nice, cheap weapon modifier to help bolster your attack.
• In terms of infinite use scrolls, the best to use against this opponent are:
Feather Explosion :block:physical:23 :dmg:wind:5-8 :heal: 7% |
Tasselled Aegis :block:dark:25 :dmg🔥6 :heal: 9% |
Aftershocks :block:physical:5 :block:dark:5 :block:earth:7 :dmg:magma:6 :heal: 7% |
• Physical (:dmg:physical:) is the most prevalent attack icon, followed by dark (:dmg:dark:) and water (:dmg:water:), then, to a lesser extent, ice (:dmg🧊) and earth (:dmg:earth:).
:block:physical:200 |
:block:physical:110 :block:dark:0 or 66 |
:block:physical:75 |
:block:physical:40 or 60 :block🧊40 or 60 |
:block:physical:50 :block:earth:125 |
:block:dark:130 :block:earth:45 |
:block:dark:130 |
:block:dark:75 |
:block:dark:50 or 65 or 80 :block:earth:50 or 65 or 80 |
:block:dark:45 or 50 :block🧊45 or 50 |
:block:water:130 |
:block:water:125 :block:dark:55 |
:block:water:75 |
:block:water:75 |
:block:water:60 :block🧊60 |
:block:water:45 :block:earth:45 |
Again, The Ether and Manifesting Weapon are going to be the ideal weapons for this opponent because together they block all three of these elements.
• Para Jacques can freeze you so be sure to mod your weapons with around three to four .
For the remaining mod slots, you can opt for defensive crystals to boost your weapons' defenses. If you'd prefer attack crystals instead, the only icons that don't have a chance to be blocked by his weapons are physical (:dmg:physical:), earth (:dmg:earth:), and wind (:dmg:wind:).
• Any of these can be used for your infinite use scroll:
Feather Explosion :block:physical:23 :dmg:wind:5-8 :dmg:physical:5 :dmg:earth:5 :heal: 7% |
Tasselled Aegis :block:dark:25 :dmg:earth:6 :heal: 9% |
Strength of the Paramnesia :block:physical:11 :block🧊12 :dmg:earth:9 :heal: 9% |
Aftershocks :block:physical:5 :block:dark:5 :block:earth:7 :dmg:earth:10 :dmg:physical:6 :heal: 7% |
Skelly :block:dark:8 :block🧊8 :dmg:physical:7-8 :dmg:earth:4 :heal: 8% |
Ocean Currents :block:water:12 :block🧊12 :heal: 8% |
Most of them deal physical, earth, or wind icons, which aren't blocked by his weapons, and all protect against physical, dark, water, ice, or earth, which are the elements used by his weapons.

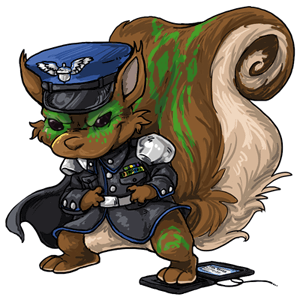
• This opponent's most common icons are dark (:dmg:dark:) and earth (:dmg:earth:) by far, and I recommend focusing on blocking these elements foremost.
:block:dark:130 :block:earth:45 |
:block:dark:130 :block:wind:40 |
:block:dark:75 :block:magma:65 |
:block:dark:50 or 65 or 80 :block:earth:50 or 65 or 80 |
:block:earth:125 :block:physical:50 |
:block:earth:100 :block:dark:33 |
:block:earth:45 :block:light:130 |
I would try to use two dual blockers for this opponent if you can. Para Buttwings's weapons span seven different elements (:dmg:dark::dmg:earth::dmg🔥:dmg:physical::dmg:light::dmg:wind::dmg:magma:) and it can be difficult to get enough defensive coverage if you aren't dual blocking.
• Since you don't have to worry about being frozen, you have the option of covering the rest of its many icons with elemental defense mod crystals. This challenger also doesn't block anything so you can go wild with attack crystals if you want. Just remember that blessings are disabled and you won't get that added effect from your crystals.
• For the choices of an infinite use scroll:
Tasselled Aegis :block:dark:25 :heal: 9% |
Swift Blade :block:earth:17 :heal: 7% |
Retribution :block🔥17 :heal: 300 HP |
Feather Explosion :block:physical:23 :heal: 7% |
Aftershocks :block:dark:5 :block:earth:7 :block:physical:5 :heal: 7% |
Strength of the Paramnesia :block:physical:11 :block:magma:11 :heal: 9% |
Depending on which weapons you're using, there are a lot of scroll options to choose from. It may even be helpful to pick a scroll that blocks an element your weapons aren't blocking to help give you more defensive coverage.
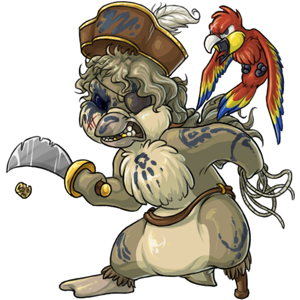
• Fire (:dmg🔥) is going to be the most annoying of its attack icons because its Paramnesia Orb of Destruction can do massive damage if you're left unprotected. Wind (:dmg:wind:) and dark (:dmg:dark:) are the next most common.
:block🔥135 :block:magma:50 |
:block🔥130 :block:dark:45 |
:block🔥130 :block:light:40 |
:block🔥125 |
:block:wind:130 :block🔥45 |
:block:wind:100 |
:block:wind:55 :block🔥55 :block:water:55 |
:block:dark:130 :block:wind:40 |
:block:dark:130 |
:block:dark:75 :block:magma:65 |
:block:dark:50 or 65 or 80 |
:block:dark:45 or 50 |
Keiths Ultimate Freezewand of Doom, Natasha, Swashbuckle, Cork Tipped Cutlass, Shinwas Sacred Bow, Tainted Keeper Skull Staff, and Insektdammerung are going to be the preferred choices since they deal either physical or ice attacks (:dmg:physical::dmg🧊), which are the only two elements that aren't blocked by this opponent's weapons.
• Freezing is disabled entirely here so you can't freeze and you don't have to worry about being frozen. This makes mod crystal choices at your discretion. If you're considering adding more attack, crystals that add physical or ice icons (:dmg:physical::dmg🧊) are recommended over the other elements. If instead you want to add more defense, fire, wind, dark, light, magma, and water (:block🔥:block:wind::block:dark::block:light::block:magma::block:water:) are all used by its weapons. Any of the elemental defense crystals for these icon types would be helpful, especially if you have any gaps in coverage left after choosing your weapons and scrolls.
• Defensive scrolls can be used to complement the icon(s) you did or didn't block with your weapons.
Fatal Fire :block🔥75 :block:dark:75 10 AP |
Sancturia Exodin :block🔥15 or 75 or 75 :block:wind:15 or 75 or 75 :block:light:15 or 75 or 75 8 AP |
Cobalt Eternal :block🔥15 or 75 or 75 :block:dark:15 or 75 8 AP |
Perilous Whirlpool :block🔥75 7 AP |
Lucky :block:dark:75 19 AP |
Typhoon of Valor :block:wind:75 7 AP |
Sancturia Exodin can be very useful here with its ability to block fire, wind, and light. The next most useful scroll would be Fatal Fire, which reliably blocks a significant amount of both fire and dark icons. However, any of these scrolls can be helpful depending on how you want to strategize.
• If you'd like to opt for healing scrolls instead,
Gift of the Forj :heal: 1,500 HP 15 AP |
Lucky :heal: 500 HP 19 AP |
Rage of the Paramnesia :heal: 5,000 HP 75 AP |
Loading up on several Gifts of the Forj can make battles go much more smoothly when freezing is disabled. Forj Matriarch, the Erupting is defeatable by T11 pets so you should be able to earn and equip at least one for when your health drops low.
• Infinite use scrolls that have use against this opponent are:
Tasselled Aegis :block:dark:25 :dmg🧊11 :heal: 9% |
Skelly :block:dark:8 :block:light:8 :dmg:physical:7-8 :heal: 8% |
Maelstrom :block:wind:25 :dmg🧊6 :heal: 9% |
Retribution :block🔥17 :heal: 300 HP |
Ocean Currents :block:water:12 :dmg🧊4 :heal: 8% |
Triple Threat :block🔥10 or 15 :block:wind:10 or 15 :heal: 7% |
Many of these scrolls deal physical or ice icons (:dmg:physical::dmg🧊). They all can also block either fire, wind, dark, light, or water icons (:block🔥:block:wind::block:dark::block:light::block:water:), which are the elements used by its weapons.
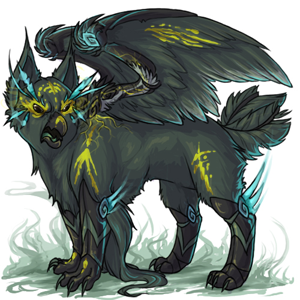
With several weapons, a scroll and a curse, this is the most complex challenger of the bunch. He also uses every single icon type between all of his weapons.
Highest Priority ----> Lowest Priority |
:block:light: :block:wind: :block🧊 :block:dark: :block🔥 :block:physical: :block:earth: :block:magma: :block:water: |
• The most common icons this opponent uses are light and wind, followed by ice, dark, fire, and physical, then earth, water and magma to a smaller extent.
:block:light:135 :block:wind:50 |
:block:light:130 :block:earth:45 |
:block:light:130 :block:magma:45 |
:block:light:100 :block🔥33 |
:block:light:60 or 75 :block:water:0 or 45 or 75 |
:block:light:65 :block:water:65 |
:block:light:45 :block🧊130 |
:block:light:40 :block🔥130 |
:block:wind:130 :block🔥45 |
:block:wind:55 :block🔥55 :block:water:55 |
:block:wind:40 :block🔥40 :block🧊40 |
:block:wind:40 :block:dark:130 |
:block🧊130 :block:dark:45 |
:block🧊125 :block🔥25 :block:water:25 |
:block🧊60 :block🔥60 |
:block🧊40 or 60 :block:physical:40 or 60 |
:block🧊45 or 50 :block:dark:45 or 50 |
:block:physical:110 :block:light:0 or 66 :block:dark:0 or 66 |
As you can see, there are tons of options now thanks to the recent weapon revamp. You have your pick of double and even triple blockers 😊 I would choose two of these that help you cover at least three, if not four, of Para GE's most common elements (:block:light::block:wind::block🧊:block:dark::block🔥:block:physical:).
• This opponent's Psycho Smasher Scroll has a 66% chance to freeze and will be used on every turn. It's important to modify your weapons with at least three or four to avoid being frozen.
Also due to the revamp, this scroll no longer blocks any ice icons. This means you can fill your remaining mod slots with virtually anything you want. Though opting for defensive crystals makes the most sense because this opponent can use any element in its attacks. More defense will help you cover all the bases.
• An infinite use scroll that would be great to use includes:
Skelly :block:light:8 :block🧊8 :block:dark:8 :heal: 8% |
Maelstrom :block:wind:25 :heal: 9% |
Strength of the Paramnesia :block🧊12 :block:physical:11 :block:magma:11 :heal: 9% |
Ocean Currents :block🧊12 :block:water:12 :heal: 8% |
Tasselled Aegis :block:dark:25 :heal: 9% |
Aftershocks :block:dark:5 :block:physical:5 :block:earth:7 :heal: 7% |
Any of these will help you cover more defense icons. They also add to your attack and heal you each turn.

• Physical (:dmg:physical:) and earth (:dmg:earth:) are the most common icon types by a long shot and you'll need weapons that block each.
:block:physical:200 |
:block:physical:110 :block:dark:0 or 66 |
:block:earth:130 :block🧊45 |
:block:earth:125 :block:physical:50 |
:block:earth:100 :block:dark:33 |
Three out of four of its weapons have a strong physical attack so you absolutely need some type of physical blocker. The earth attacks on half of its weapons are very strong as well. Just make sure you are blocking those two elements in some fashion.
• You can be frozen and you'll need to equip at least three or four for freeze protection.
I would devote the rest of the mod slots to defense. You can either opt for blocking more earth and physical, or you can branch out to the other elements it uses like magma, ice, dark, or water (:block:magma::block🧊:block:dark::block:water:). If you prefer attack crystals, just be sure to avoid ones that add physical or earth icons as this opponent can block those.
• The best infinite use scrolls to use against this opponent are:
Strength of the Paramnesia :block:physical:11 :block🧊12 :block:magma:11 :heal: 9% |
Feather Explosion :block:physical:23 :heal: 7% |
Swift Blade :block:earth:17 :heal: 7% |
Aftershocks :block:physical:5 :block:earth:7 :block:dark:5 :heal: 7% |
Ocean Currents :block🧊12 :block:water:12 :heal: 8% |
Tasselled Aegis :block:dark:25 :heal: 9% |
Mana Surge :block:magma:25 :heal: 9% |
All of these block this opponent's icon types in some capacity. Ocean Currents and Mana Surge have a slight advantage over the others because they don't use earth or physical elements in their attacks, which have a chance to be blocked by Para RB's weapons.
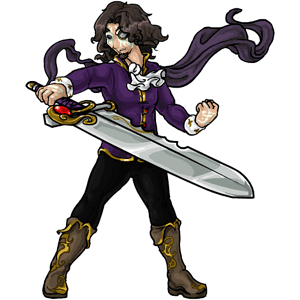
Paramnesia Saggitarius is going to be an all around difficult challenger. His attack icons are spread across seven different elements (:dmg🔥:dmg:light::dmg:magma::dmg:dark::dmg:physical::dmg:earth::dmg:wind:) and he blocks significant amounts of five different elements (:block:magma::block:physical::block:dark::block🔥:block:light:). The four elements he does not block are water, earth, ice, and wind (:dmg:water::dmg:earth::dmg🧊:dmg:wind:).
• Fire and light are his weapons' most common icon types and you will need to block both:
:block🔥135 :block:magma:50 |
:block🔥130 :block:dark:45 |
:block🔥130 :block:light:40 |
:block🔥125 |
:block:light:135 :block:wind:50 |
:block:light:130 :block:magma:45 |
:block:light:130 :block:earth:45 |
:block:light:100 :block🔥33 |
Out of the fire blockers, the Freezewand is the going to be the first choice because none of its attack icon types (:dmg:wind::dmg🧊) are blocked by any of Para Saggi's weapons. The others will be able to get the job done though, just at a slower pace. Out of the light blockers, Hand of Goddessbane is the top choice because of its significant earth attack (:dmg:earth:).
• Since Natasha blocks both fire and light pretty well, you may want to opt for pairing it with something else. A magma blocker (:block:magma:) makes the most sense because his Paramnesia Dragon Heart can hit pretty hard.
:block:magma:135 :block:earth:50 |
:block:magma:130 |
:block:magma:65 :block:dark:75 |
• Once again, you can be frozen and need to mod your weapons with at least three or four .
I would devote the rest of your mod slots to either more defense or more attack depending on what your setup is. If you feel your defense is pretty strong, then opting for crystals that add more attack icons that he doesn't block (:dmg:earth::dmg🧊:dmg:water::dmg:wind:) makes sense. Freezing crystals in particular can add to your scrolls' freezing power while also doing ice damage (:dmg🧊). If, however, you feel you need more defense, focus on blocking those fire, light, and magma icons first (:block🔥:block:light::block:magma:) before the lesser ones (:block:dark::block:physical::block:earth::block:wind:).
• For your infinite use scroll, any of these will work:
Tasselled Aegis :block:dark:25 :dmg🧊11 :dmg:earth:6 :heal: 9% |
Strength of the Paramnesia :block:magma:11 :block:physical:11 :dmg:earth:9 :heal: 9% |
Aftershocks :block:dark:5 :block:physical:5 :block:earth:7 :dmg:earth:10 :heal: 7% |
Feather Explosion :block:physical:23 :dmg:wind:5-8 :dmg:earth:5 :heal: 7% |
Maelstrom :block:wind:25 :dmg:water:11 :dmg🧊6 :dmg:wind:6 :heal: 9% |
Each of these scrolls protects against at least one of the attack icons on Para Saggi's weapons. They also use either earth, ice, water, or wind, which are all elements that his weapons don't block.
These opponents are intended to be tough and challenging, but that is what makes them fun and rewarding! If you're still struggling after trying your hardest, it's okay to stop and come back to them later. These are permanent challengers and they aren't going anywhere.
As always, best of luck battling 🍀
Thanks for doing this Jess!
| [flower=Damon] | [tot=Damon]
Rage scroll 
Energy 
[flower=Avarice]
My Armory! DM if you want to borrow

[box=green]
High Score Table Quick Links
 |
 |
 |
 |
 |
 |
 |
This guide to the new super challengers is now complete! I hope it helps <3 If anyone has critiques or additional ideas on what information should be included, let me know.
Thank you for the stats and thank you for the quick links :D
Thank you for the guide! Currently trying not to lose my mind trying to hit 5 on Irion (the other two went smoothly with your tips).
I'm glad they helped!
I'm not sure if you can edit the stats for the new scrolls on SubetaLodge, but has changed two of them since they were created:
• The new stats and AP cost for the Strength of the Paramnesia Scroll can be found in its hover link here.
• The Energy of the Paramnesia Scroll's new base stats and AP cost can be found here and its defense now also scales based on the max HP of the opponent (confirmed by on Subeta's Discord).
| 1-10,000 HP | :block:dark:25 :block:water:25 :block:wind:25 |
| 10,001-15,000 HP | :block:dark:45 :block:water:45 :block:wind:45 |
| 15,001-20,000 HP | :block:dark:65 :block:water:65 :block:wind:65 |
| 20,001 HP+ | :block:dark:85 :block:water:85 :block:wind:85 |
I have edited the stats! Thank you for the updated info and I hope he's done tinkering now too haha.
You are missing HoG from the saggi guide and the pink scythe as another budget option. Although anyone using budget weapons should absolutely be well into T13 for him
Thank u so much for this amazing guide <3
I thought everyone will be impossible to beat with my pet, but after reading this guide:
You Won! You have defeated Paramnesia Tide 10 times! Dieric earned 10000 EXP Points!
Now, I am going to try fight against Jacques
Congrats! 🎉
Dieric has similar stats and AP to my second battle pet, Batpod. I was able to get five wins on each challenger with him so I think you can do it too :D
Wow, 5 wins on each challenger? That looks really hard but I want to try :D
Thank you for this amazing guide!! I finally carved out some time to try my hand at these. Saggi is tough!! I had to split my 10 wins between two pets. And Irion is just a pain.
I’m going to tackle these after the reset. Lol.

Forum Art by
Signature Art by